Making Your Own Halloween VFX Videos
- TomInSeattle
- Oct 29, 2020
- 5 min read
If you read my previous post (Amping Up Your Halloween Display with VFX Ghosts), you learned how to use commercially-available VFX videos from AtmosFX.com in conjunction with a projector to cast really amazing effects onto a scrim or semi-transparent material. For many people, these videos provide fantastic illusions for a Halloween display at low cost.
Do It Yourself
But, let's say that you're a creative type who wants to create your own videos. Maybe you want to put your family's faces on a set of pumpkins, and sing a song. It's easier than you think, and you just need a few things.
Lighting
Camera
Costume(s)
Actors/Objects
Setting the Scene
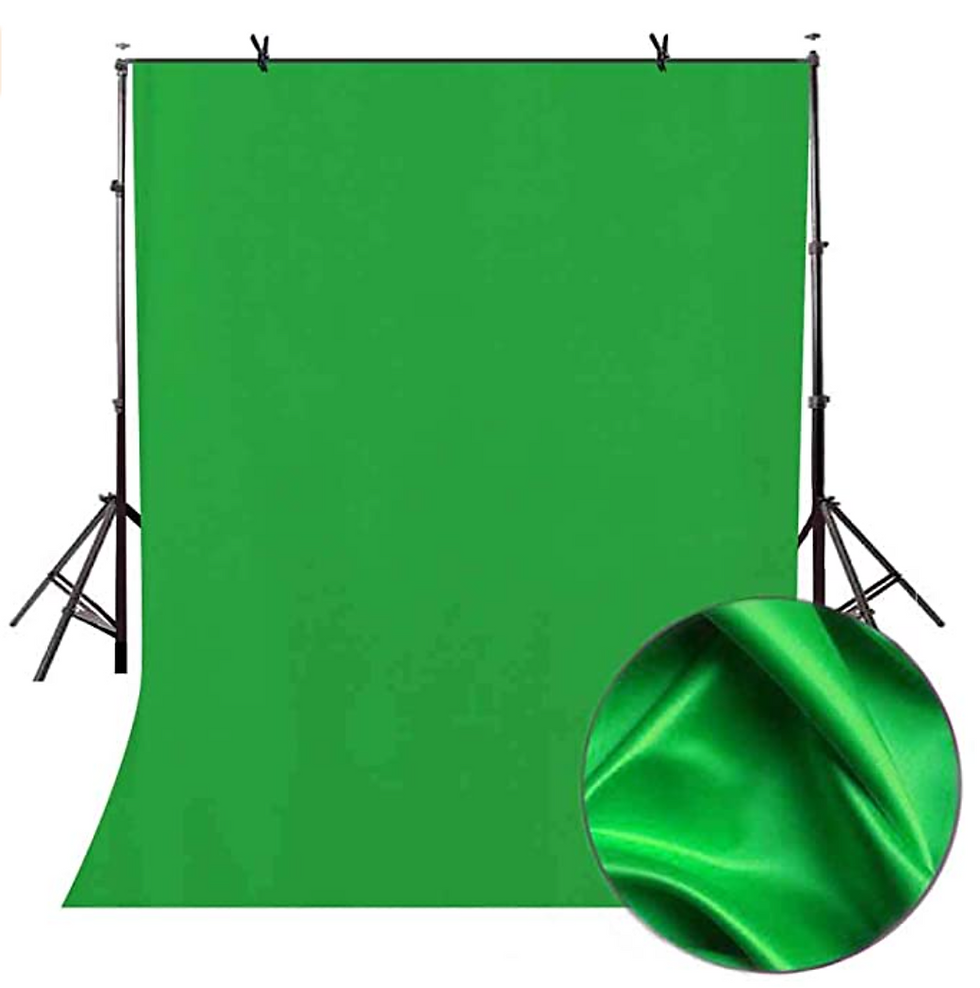
You've probably seen Hollywood movies that show actors doing extremely dangerous to impossible things. The so-called "green screen" is the bread-and-butter of VFX artists. The concept is pretty simple: You photograph an actor or object in front of a green screen, remove the green background (a technique traditionally called rotoscoping) in post-production, and substitute another background. It allows you to place the actor or object in any setting.

The choice of the color green was arbitrary. Technically speaking, you can pick any color screen; however, it's really important that the actor/object that you're filming isn't wearing same-colored green clothing, or it will become transparent when you remove the background. There are circumstances where you want that to happen. For example, let's say that you only want the actor's head to appear in a shot. You can wrap the actor's neck and torso in green fabric. Or, you may want a part of the actor's clothing or anatomy to be removed and replaced with something else; for example, when Arnold Schwarzeneggar plays "The Terminator", he often has green patches applied to his face which will be replaced digitally with underlying robot parts.
Lighting
Another important element is lighting. Three-point lighting is the traditional way of lighting a subject, but you can also light a subject with natural light/sunlight. It just depends on the look that you're going for. Halloween videos tend to be dimly lit, but there has to be sufficient light on your subject. This may require experimentation. There is no easy prescription here. Try different light levels.

Camera
You will, of course, need a camera; fortunately, you probably already use the camera in your phone, and it's suitable for shooting these kinds of videos. You might want to invest in a low-cost tripod, though, because it's difficult to keep a phone steady. Decide whether you want your video to be wide or tall. If you want to display your video in a doorway, you will want the latter; for a window, the former. Position your camera accordingly. If you want the subject of the shot to shake or move --- for example, to simulate an earthquake or some other phenomenon -- it's often easier to move the camera than have the actors or objects move. In that case, you probably want to hold the camera, yourself.
Subjects
Assemble your cast of actors in costume, or objects you want to film. There's a reason why actors use makeup. It can accentuate their features or smooth out rough spots. Be creative. Examine the subjects through the camera to make sure that they're placed correctly in the scene. Give the signal that the camera is about to start rolling, and let the magic happen.
Voila!
When you're done, you will have a video file with a green background like the following.
Royalty-Free Green Screen Video example

Post-Production
Now, that you have a video, it's time to run a software program that will do the heavy lifting of removing the green background. I use industry-standard Adobe After Effects. After Effects is commercial software and requires a subscription. At last glance, the cost is around $20/month, but you can cancel at any time. You can probably find other software which does some of what After Effects does, but probably not everything it does.
Boot After Effects, and create a new composition.

You will see a dialog. Specify the resolution of your video, and select OK. The defaults are probably fine for most people, but pay attention to the width and height of the composition. You will need to match the width and height to the video you shot. Don't resize it, or you will lose quality.

Next, you need to import the video file that you shot.

The video will appear in the project area. Drag it down to the timeline (red rectangle area) below.

The first frame of the video will show in the composition area. The next thing that you want to do is apply a Linear Color Key effect. This effect will remove the background. Notice on the right hand side of your workspace there's an Effects & Presets tab. Click to open it up. Type "Color Key" in the search box. You will see the Linear Color Key effect. Select it.

After selecting the effect, click on the layer to open it up. You will see "Effects" listed for the layer. Open it up, and you will see the Linear Color Key effect that you applied. Select it. That will show a bunch of properties for that effect above (Key Color, Match colors, Matching Tolerance, etc).

Click on the eyedropper tool and select a green pixel in the box above (see red rectangles). You're telling the Linear Color Key effect that you want it to remove the color green.

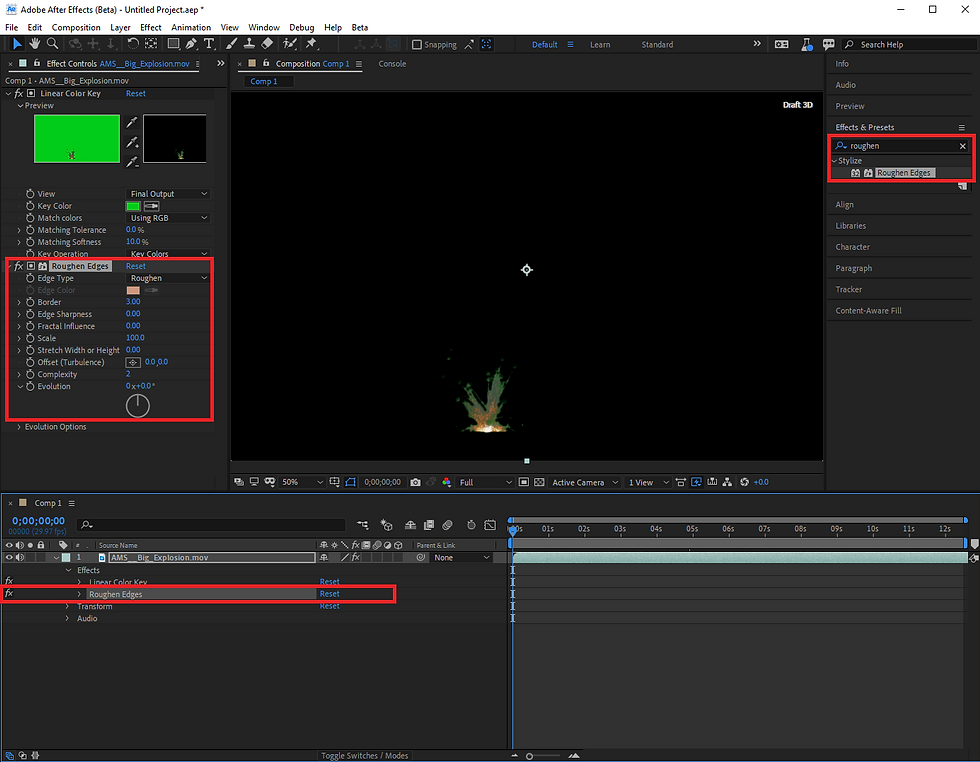
Notice in the composition view, After Effects runs the Linear Color Key effect on that layer, and renders the frame without the green background. The default background is now black. The only thing that displays on that background is the explosion. There's another subtle detail that you probably won't notice. The edges of the explosion are a bit stark. What we really want to do is feather the edges so that they look more natural. That's the next step.

Go to the Effects & Presets tab again, and search for "Roughen". Select the Roughen Edges effect. After Effects will add the Roughen Edges effect to that layer. Notice above you can change the properties of the effect. We don't want the effect to roughen the edges too much, so specify a Border value of "3.0", Edge Sharpness of "0.00" and Fractal Influence of "0.00". That looks better.

We are effectively done. All that's left is to export the video to the Adobe Media Encoder, which is a separate standalone app that lets you specify the video export format (e.g. MP4), bitrate, etc. You will probably want to stick to the defaults.

Once you learn the basic tools, you can process videos like this in a few minutes. We just scratched the surface of what After Effects can do. You can drag multiple videos onto the timeline, and have After Effects fade from one video to another. On the righthand side of the timeline, you can slide the video to the time position (e.g. 5 secs) where you want it to display, and then you can animate the Opacity parameter by clicking on the little clock icon beside Opacity. You would start at Opacity 0%, move the timeline slider to another time position (e.g. 8 seconds), and specify Opacity 100%. That tells After Effects that you want to start animating at 5 secs with Opacity 0% and fade in to 100% at 8 seconds. Pretty simple and very effective.

If you have any questions or comments, please leave them in the comments section below. Hopefully, that gives you a good idea of how to create these sorts of videos.


Making Halloween VFX videos sounds like a blast! I’ve been experimenting with special effects myself, and I’ve found free screen recorder by Movavi to be super helpful for editing. It’s not too complicated, and it has a lot of cool features that make adding effects or tweaking footage easy. If you’re into DIY VFX, it’s definitely worth checking out as a beginner-friendly tool!